The flash/portrait group will not be running this week.
Category: Special interest groups
A beauty-full night at the Portrait & Flash Group
On Wednesday night members of the Portrait & Flash Group were able to put previously learned portrait and flash theory into practise with some dedicated subjects. Thanks to Teddy Tan, we were graced with three models: Cassie, Jodie and Monica who were all very comfortable at the other side of the camera lens.

Anyone who has ever been in front of a camera at a portrait workshop will know it’s definitely not as easy as it looks, but these women were in their element and made it look so easy (even with limited directing.)



With the Knox Interclub being held on the same night, we were a few members down from past nights but with a few newbies coming along, there was a cosey ratio of models to photographers.



A special thanks to Cassie, Jodie, Monica and Ted for making the night a success.
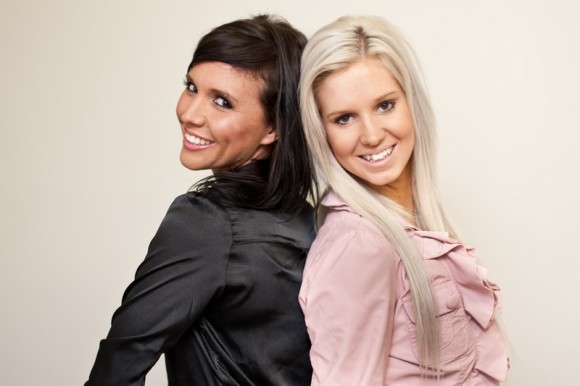
The WCC Portrait & Flash Group is held on the fourth Wednesday of the month at 7:30pm. New members are welcome!
Follow-up on portrait photography
Following the excellent talk from David Williams at the last workshop evening, Ross Garner sent through the following:
After the inspiring talk from David Williams last tuesday night I have been doing some research on lenses and remote flash triggers.
I found this site had good information: Strobist: Lighting 101
The following comments are for Canon users, however I think the same price points apply to Nikon and other brand cameras.
Lenses
Canon make two (affordable) 50mm lenses:
- EF 50mm f/1.8 II, costs about $140
- EF 50mm f/1.4 USM, costs about $500
I noticed David was using the Sigma 50mm F1.4 EX DG HSM which costs about $650
Seems the Sigma is recognised as the best lens. However the cheaper Canon does get good review for sharpness on non full frame DSLR cameras.
Remote control
Only the Canon ST-E2 Speedlite Transmitter gives TTL contol of the flash. ie the flash intensity controlled by the camera.
Available 3rd party items will trigger the flash, but not control the intensity
There is a limit of about 10m between the camera and the flash
In addition to the Sigma 50mm lens (available for other brands than Nikon, eg Canon), David was also demonstrating using a Nikon D5000 (shows you don’t need the expensive camera to get great results) and was triggering the external flashes with a Nikon SU-800 Wireless Speedlight Commander.
Both the Canon ST-E2 and Nikon SU-800 use infrared light which is what limits their range. Recently E-TTL compatible radio based remote triggers have become available, however they are quite pricey and are a significant investment (as much or more as your camera).
If you were also inspired and want to learn more, then you should be coming along to the Portrait & Flash Photography group at its second meeting next Wednesday. The site Ross found, Strobist, was also mentioned by David Gilliver at the first meeting and I expect it to be an essential resource for the group.
Second Portrait & Flash Group meeting
As Teddy will be away for this month’s Flash Portrait Group meeting he has asked Warren to take the class in his absence. What he would like to cover in this meeting is the following:
- A quick recap of the information presented by David Gilliver in the last meeting. There must be lots of questions now that you have had a few weeks to digest what he had to say.
- A run down on what equipment you will need to get you started with OFF-camera flash on a budget.
- Why OFF camera flash is so useful. Warren will bring some images in so we can dissect them and try to understand how the light has been used to good effect.
- Get some feedback from the group as to what you want to get out of future sessions. These can then be passed on to Teddy so he can tailor future classes accordingly.
It should be an informative night with lots of interactive discussion.
Homework For The Beginners Class
Homework for the July beginners class is as follows:
Dig out the manual for your camera and look up the section on white balance and how to change it. Most cameras won’t allow you to change the white balance whilst in automatic mode so if you need to put your camera on to another setting that is quite okay. Nearly all models of camera have a setting very similar to automatic – on a Canon it’s called Program – which will allow you to change the white balance but still work out the exposure and aperture settings for you.
Make sure that if you take it off automatic that you are still shooting jpeg rather than RAW.
Once you have studied the manual and can change the white balance I want you to pick one subject and photograph it using every preset white balance setting available to you. By preset I mean daylight, cloudy, flourescent etc.. Do not concern yourselves with custom settings at this stage.
You will need to set your camera up on a tripod and shoot all your shots as quickly as possible.
Try to do this at a time when the light isn’t fluctuating. For this to work you need to have your subject lit the same way in each shot. Put all your knowledge of composition and lighting to good use and try to produce the best shots you can.
Once you have taken all your shots with each white balance setting go through them and select the one you like best and the one you like least. Resize them so that they are no wider than 1024 pixels and no higher than 768 pixels. Name the files correctly, and for the title put the name of the white balance setting used and wether it’s the best or worst.
For example my best shot could be: WCCA-0907-14A-Tungsten best
Send the two files to: homework@waverleycameraclub.org by 7pm on Monday the 27th of July.
Now here comes the bit where I make it harder, after all it’s more fun when I’m nasty.
THE SUBJECT YOU CHOOSE TO PHOTOGRAPH MUST BE PREDOMINANTLY WHITE.
Enjoy!